目次
はじめに
Photon Fusion で開発中のアプリを通信環境の悪い状態でテストしたかったので、「Network Link Conditioner」を利用しました。「Network Link Conditioner」は、Apple Developersで無料配布されているApple公式のアプリです。
- 環境:OS Monterey 12.4
インストール
「Network Link Conditioner」は「Additional Tools for Xcode」に含まれているので最新版の「.dmg」をこちらのリンクからダウンロードします(デベロッパーアカウントが必要です)

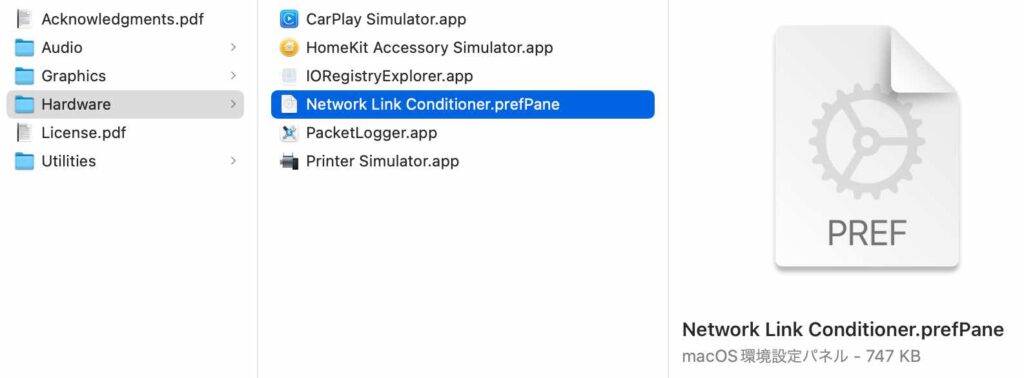
ダウンロードした「.dmg」を開くと「Hardware」フォルダがあります。その中に「Network Link Conditioner.prefPane」があるのでダブルクリックしてインストールします。
使い方
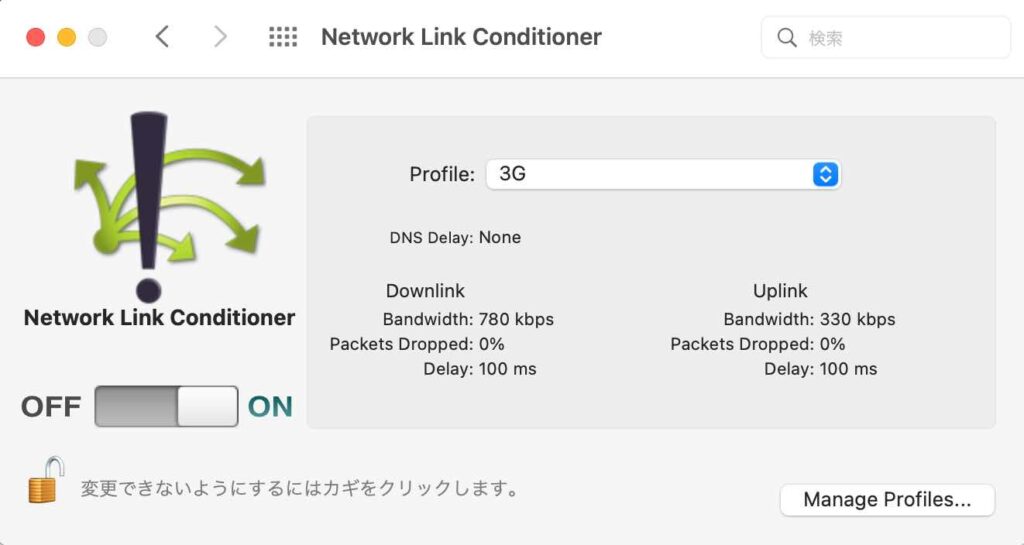
「システム環境設定」から「Network Link Conditioner」の管理画面を開きます。
ON / OFFスイッチで動作を制御できます。Profileで帯域制限をプリセットから選択します。Manage Profilesから帯域制限をカスタムすることも可能です。