目次
はじめに
Unityで出力したWebGLをレスポンシブデザインに対応させます。
CSSを作成
「style.css」を新たに作成して下記を記入します(widthやheightは調整してください)
/*----------------------------------------------------------------------------
Unity-webgl
----------------------------------------------------------------------------*/
#unity-webgl{
	/* 16:9 */
	width: 640px ;/*デフォルトの横幅*/
	height: 360px ;/*デフォルトの縦幅*/
}
@media screen and (max-width: 1240px){/*1240px以下*/
	#unity-webgl{
		width: 640px ;
		height: 360px ;
	}
}
@media screen and (max-width: 1023px){/*1023px以下*/
	#unity-webgl{
		width: 640px ;
		height: 3600px ;
	}
}
@media screen and (max-width: 834px){/*834px以下*/
	#unity-webgl{
		width: 480px ;
		height: 270px ;
	}
}
@media screen and (max-width: 480px){/*480px以下*/
	#unity-webgl{
		width: 400px ;
		height: 225px ;
	}
}
「index.html」を編集
Unityから出力された「index.html」を開いて<head>内に下記を記入します。(上記「style.css」ファイルと「index.html」ファイルを同階層に置かない場合は「rel」を編集してください)
<link rel="stylesheet" href="style.css">「index.html」の<body style= >と<canvas>タグを以下のように編集します。(<script>はそのままにしてください)
<body style="
  position: absolute;
  top: 0;
  right: 0;
  bottom: 0;
  left: 0;
  background: #231F20;
  ">
  <canvas id="unity-canvas"
    style="
    position: relative;
    width: 100%;
    height: 100%;
  "></canvas>
iframeで呼び出す
下記の要領でブログなどWebGLを呼び出すページにiframeタグを記載してください。
<iframe
 id="unity-webgl"
 loading="lazy" width="640px" height="360px"
 src="WebGLのURL/index.html"
 scrolling="no" frameborder="0">
</iframe>id="unity-webgl"CSSファイルでレスポンシブデザインに対応するための属性です。
loading=”lazy”遅延読み込み設定です。
src="WebGLのURL/index.html"WebGLを配置するディレクトリに編集してください。
以上です。
補足
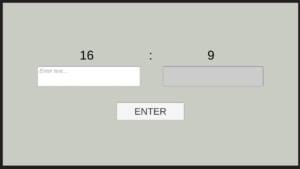
上記手順でレスポンシブデザインに対応したWebGL「16:9」を計算するツールです。
あわせて読みたい

【Unity】WebGL – 16:9 解像度計算&早見表
長辺を左側に入力してENTERを押してください。短辺が右側に表示されます。(少数第1位まで) 開発:Unity2020.3.21 WebGL(モバイルで動きますがベータ版扱いです) 16...