目次
はじめに
Unity Particle Systemの知ってると便利な裏ワザ的な豆知識をいくつか紹介します。

消さずに表示しておく
通常、パーティクルは「Start Lifetime」に入力された秒数が経過すると消えてしまいますが、「Infinity」と入力することで、ずっと生存させることができます。
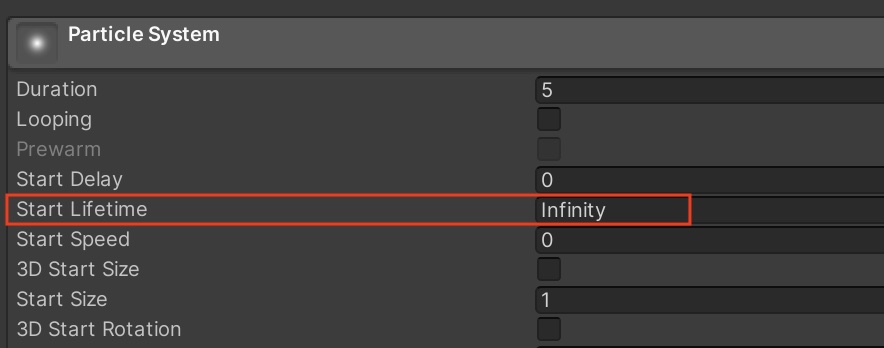
また、「Infinity」のパーティクルをスクリプトから動的にオン/オフしたい場合は「Play On Awake」にチェックを入れて「SetActive()」で制御すると楽です。(Clear()も試しましたが不安定でした)
particles.gameObject.SetActive(true);
particles.gameObject.SetActive(false);
Spriteを使いたい
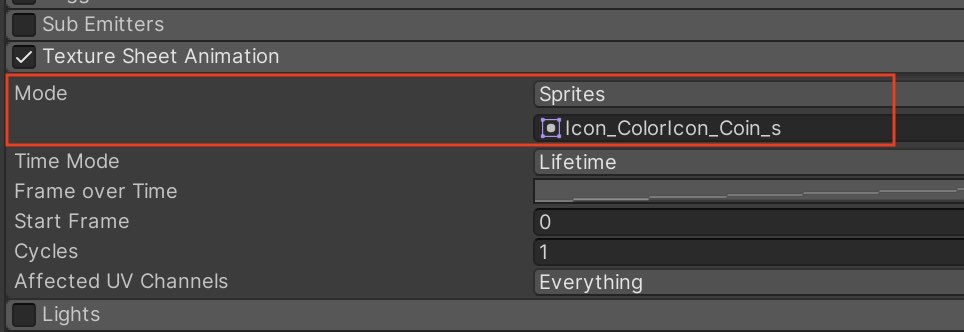
「Sprite (2D and UI)」タイプの画像素材を使うこともできます。UI素材から流用できるので、容量を増やすことなくアセット管理ができて有効です。「Texture Sheet Animation」を利用します。「Mode」を「Sprites」にして、表示したい画像を登録します。
UIの前に表示したい
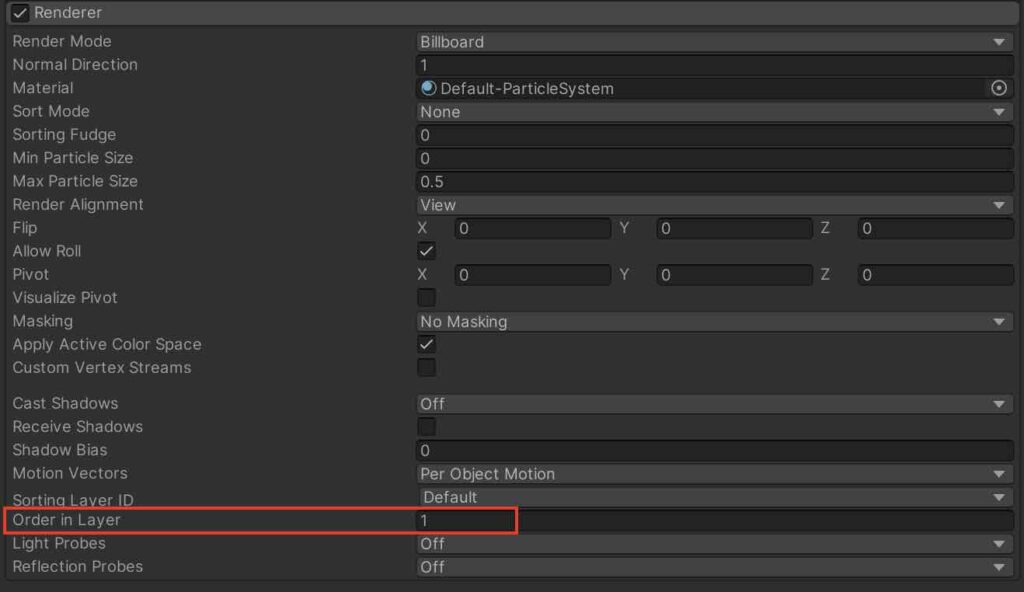
UIの前にパーティクルを表示することも可能です。パーティクルの「Renderer」の「Order in Layer」の数値をUI「Canvas」の「Order in Layer」より大きくします。
サンプル
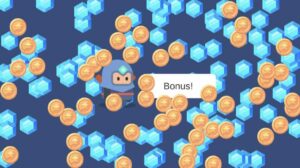
紹介した内容を組み合わせることで、下記のような絵作りができます。


パーティクルでコインを発生させているので大量のコインを一枚一枚配置しなくて済みます。
- ちなみに画像素材はこちらのアセットを使用しました。